
|
|
 |
|
|
|
Welcome to the Australian Ford Forums forum. You are currently viewing our boards as a guest which gives you limited access to view most discussions and inserts advertising. By joining our free community you will have access to post topics, communicate privately with other members, respond to polls, upload content and access many other special features without post based advertising banners. Registration is simple and absolutely free so please, join our community today! If you have any problems with the registration process or your account login, please contact us. Please Note: All new registrations go through a manual approval queue to keep spammers out. This is checked twice each day so there will be a delay before your registration is activated. |
|
|||||||
 |
|
|
Thread Tools | Display Modes |
|
|
#1 | ||
|
Regular Member
Join Date: Jul 2014
Posts: 190
|
Hi all, I need some help with my Capri restoration. I am getting things ready for paint but before I can paint it, I have to get all the panels mounted and lined up. So I can get nice clean gaps before its painted.
So my problem is the bonnet. I am missing almost all the mounting pieces and I need your help to tell me what I am missing and what I need to buy. I have been browsng the web looking for parts and so far I think I have worked out some of the parts. From my understanding there are a total of 7 points of contact between the bonnet and the body of the car: Hinges (2) Main bonnet latch at the front (1) Rubber Spacers to fenders (4) Am I missing something? --> I have the bonnet latch that is mounted in the slam panel (but nothing that bolts to the hood itself - so it looks like I just have one half of the bonnet latch). Picture 1 below is the part I am looking at buying for the bonnet half. Is this right?? --> I have one of the brackets that attach the bonnet to the hinge. See picture 2 below. I just have to find the other one. --> I believe I need 4 rubbers (picture 3 below) Is this right? Any help or pictures you guys could offer me of your own bonnet securing hardware I would really appreciate it.  Picture 1: 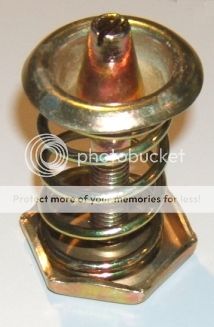 Picture 2: 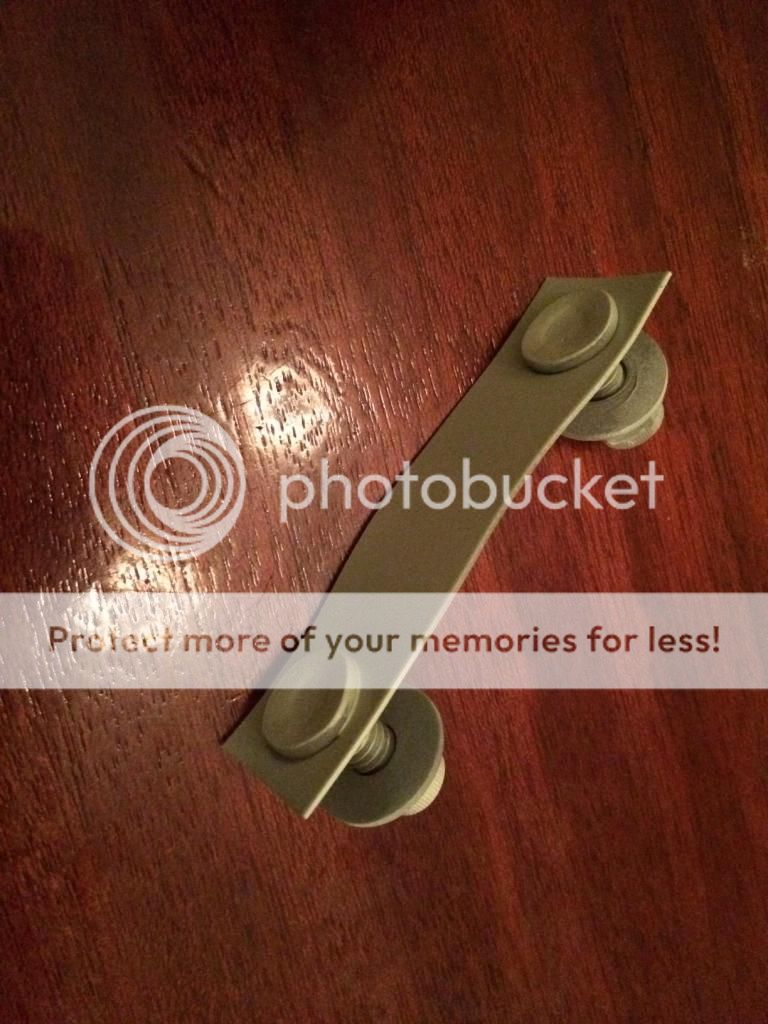 Picture 3:  |
||
|
|

|
|
|
#2 | ||
|
Regular Member
Join Date: Jul 2014
Posts: 190
|
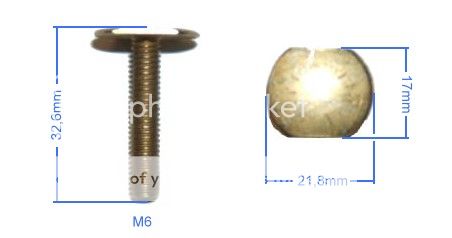
I also found these two related items for sale. Do these rubbers screw into the bonnet itself? I am guessing that I need two of these? It seems they might be to adjust the height of the bonnet when latched?
|
||
|
|

|
|
|
#3 | |||
|
Regular Member
Join Date: Oct 2006
Location: Canberra region
Posts: 356
|
Quote:
Cheers Jamie |
|||
|
|

|
|
|
#4 | ||
|
Regular Member
Join Date: Oct 2006
Location: Canberra region
Posts: 356
|
You can see them in this picture reasonably well.
http://brakehorsepower.com.au/wp-con...-super-roo.jpg |
||
|
|

|
|
|
#5 | ||
|
Regular Member
Join Date: Nov 2010
Location: Peakhurst
Posts: 82
|
Here are photos of the mounting hardware on my 1970 Capri project.
Hope this helps. Peter Last edited by peterw; 09-11-2014 at 02:43 PM. |
||
|
|

|
|
|
#6 | ||
|
Regular Member
Join Date: Jul 2014
Posts: 190
|
That's awesome guys. Thanks!
So it looks like I also need that hook thing. Must be the manual release thing. One more question. How do the side rubbers attach to the fenders? I don't seem to have any bolt holes in the rain channels so do they just wedge in there?? Thanks again! |
||
|
|

|
|
|
#7 | ||
|
Regular Member
Join Date: Nov 2010
Location: Peakhurst
Posts: 82
|
The hook is the safety catch in case the main catch fails. It's just a spring loaded hook that goes into a hole.
Not sure I know what side rubbers you are referring to? Are we still talking about the bonnet? Peter |
||
|
|

|
|
|
#8 | ||
|
Regular Member
Join Date: Nov 2010
Location: Peakhurst
Posts: 82
|
Just read your original post again and those rubbers look period correct but mine doesn't have them.
It does have some holes in the channel which I assume is for those rubbers but my car had the guards and bonnet replaced in the 70's so I doubt they are in exactly the right place. The spacing varies side to side. Here's some photos of the drivers side. Peter |
||
|
|

|
|
|
#9 | ||
|
Regular Member
Join Date: Nov 2010
Location: Peakhurst
Posts: 82
|
Try again for the photos.
Last edited by peterw; 08-02-2020 at 12:10 AM. |
||
|
|

|
|
|
#10 | ||
|
Tippy-tronic Free Zone
Join Date: Dec 2008
Posts: 897
|
The side rubbers sit in the channel and are held in by expansion plastic plugs (push thru pin expands split sleeve below)....or just some small screws/nuts works just as well.
The hook gadget thingy is the safety catch in case your bonnet latch pops open when travelling at speed and stops it flying up onto your windscreen/roof .......'event' would be very oooops ! And you need that rod as seen behind the tape measure in PeterW pic above, and Pic5 from 1:04am post. Standard fitment is just a metal rod of interesting shape, that is fitted thru an eye (and bush) on the slam panel area and inserts into an L shaped slot in the bonnet above the eye (mine is RH fitment like Peters). Some people use hatchback gas struts - fit them with the gas canister end on the bonnet to keep the rod lubricated (apparently). |
||
|
|

|
|
|
#11 | ||
|
Tippy-tronic Free Zone
Join Date: Dec 2008
Posts: 897
|
Forgot to mention that the hook gadget thingy also has a 3-4mm plate that screws to the slam panel. Otherwise when the hook decides to prevent the bonnet flying up it would just tear thru the thin 1mm sheet metal (peterw pic 2).
|
||
|
|

|
|
|
#12 | ||
|
Regular Member
Join Date: Jul 2014
Posts: 190
|
Oh yeah I have that piece that bolts into the slam panel for both latch and hook.
But I noticed on my bonnet frame I have two extra mystery holes where the hook mechanism attaches. In the other pics it just attaches with two but mine has 4 holes. Should I be welding these two extra holes closed? See pic below. The holes are in a cross formation. Thanks for all your help guys, it's great! 
|
||
|
|

|
|
|
#13 | ||
|
Regular Member
Join Date: Nov 2010
Location: Peakhurst
Posts: 82
|
It is possible that later cars had a latch with 4 bolts. Mine is 1970.
Also possible that it has had a non standard latch on it at some stage, many of them have the holes going cross ways. I would be finding a latch to do the job then modify holes to suit. Peter |
||
|
|

|
|
|
#14 | ||
|
Regular Member
Join Date: Oct 2006
Location: Canberra region
Posts: 356
|
The early latches moved sideways (to the right) when operating from the front of the car, and these were changed to a 'pull forward' later in production (sometime in '71). From photos in your project thread, you appear to have the early version.
Looking at your picture of the underside of the bonnet, the two holes that would form the top to bottom part of the 'cross' formation (as you look at the picture) won't be needed. You'll need the two side to side holes. So you'll need to buy a hook/latch for the bonnet, like the one in the attached picture, and mount it with the hook pointing towards the drivers side of the car: Last edited by cosworthfreak; 04-11-2020 at 10:00 AM. |
||
|
|

|
|
|
#15 | |||
|
Regular Member
Join Date: Jul 2014
Posts: 190
|
Quote:
The latch in the slam panel as you can see below, seems to be for the sideways model. Meanwhile the back of the bonnet frame shows that only the vertical holes have nuts welded to the back. Looking at your picture of the sideways hook, the holes should be the left and right holes. Now I can fix this by welding new nuts in place once I get a new hook of the sideways variety. So does anyone know where I might get one? Theres small ford spares in Minto but its such a long way from me I was hoping to get one online. Anyway let me know if I am right, based on the below pics of my car/bonnet: And once again thanks for the highly detailed advice from you all 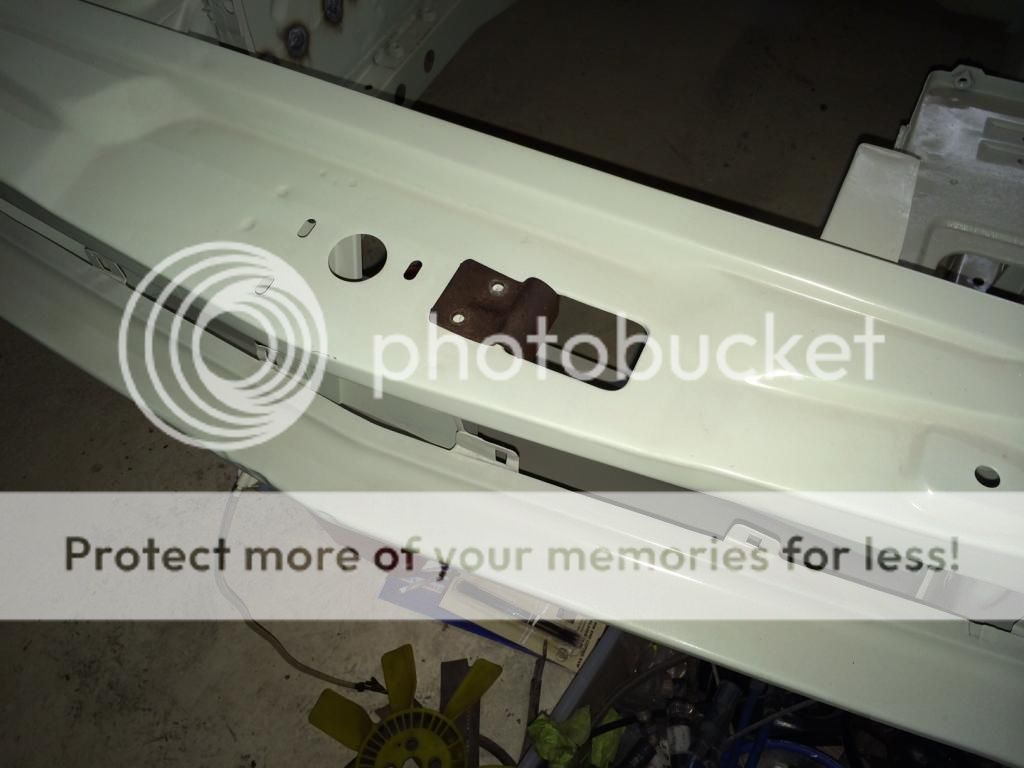 
|
|||
|
|

|
|
|
#16 | ||
|
Regular Member
Join Date: Nov 2010
Location: Peakhurst
Posts: 82
|
Unless you are after 100% concourse correct you could just browse the local wrecker for a similar part. Most cars have them.
My 83 Alfa has a very similar catch. Even if you have to modify it slightly to make it work. Peter |
||
|
|

|
|
|
#17 | ||
|
Regular Member
Join Date: Jul 2014
Posts: 190
|
Ok well I have ordered all the hardware except the hook thing. I am sure it will turn up sooner or later. But I cant weld the holes closed and re-skin the bonnet until I locate one. So I'd like to find one before too long. None on eBay at the moment.
|
||
|
|

|
|
|
#18 | ||
|
Regular Member
Join Date: Jul 2014
Posts: 190
|
Actually I just called Brian at Small Ford Parts (02 9603 5333) and he's got one. $35 + postage so he's sending it out tomorrow.
That will still need to be anodized but at least getting the part will allow me to make the mounting holes correct and weld up the redundant ones, and paint the inside of the frame before I replace the skin. And since I will then have all the mounting hardware I can get the alignment between the bonnet and the quarter panels nice and sweet before it gets painted. Happy days. Thanks for all the advice. |
||
|
|

|
|
|
#19 | ||
|
Regular Member
Join Date: Jul 2014
Posts: 190
|
ok so i have some slight hiccups and hoping you guys can help
 So the bonnet latch arrived and I get how it hooks into the slam panel but I cant see how it should attach to the bonnet. Am I missing a piece?? (see image 1 below). Secondly, the bonnet bump stops that i ordered arent the right thread for the bonnet (see image 2). I was hoping to use these to set the level correctly and get all the gaps right. Anyway so I was wondering what you guys would do? I could cut out the nut on the other side and weld in a new nut that matches the thread of the bumpstops I received, OR use the old nuts (See image 3 - not even sure if they are of the correct type but the thread matches the bonnet) and just have them anodized and put the rubber boot over the top?? I reckon either solution would work but im just a bit indecisive at the moment... image 1 of the bonnet latch... nothing to screw into... 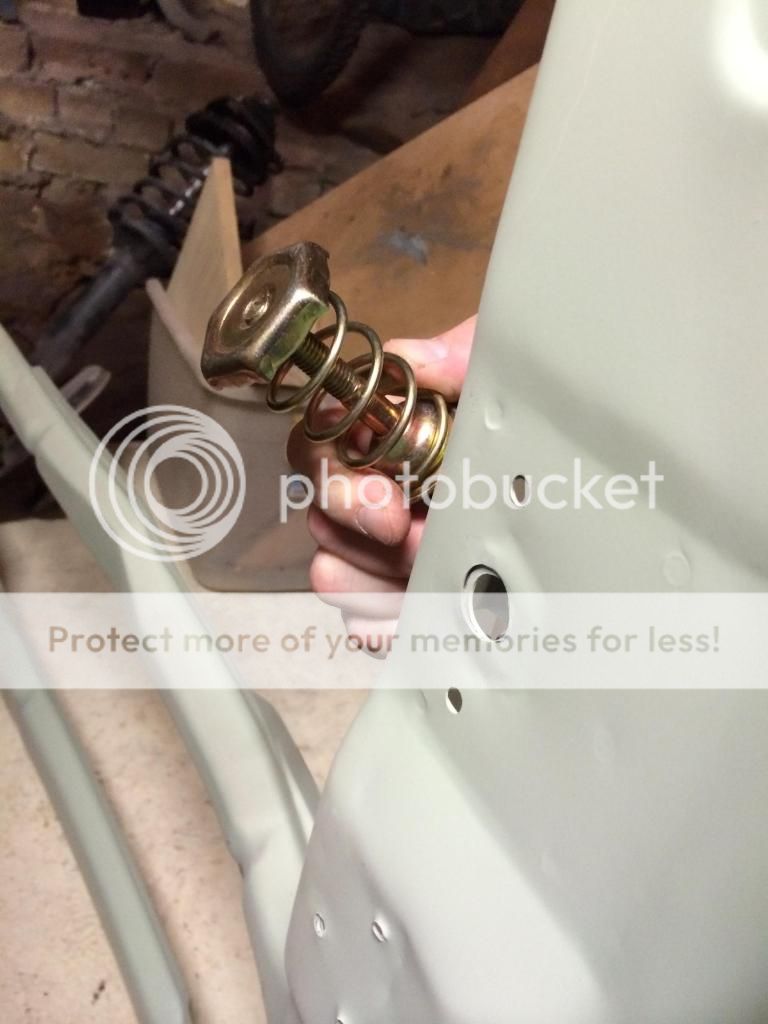 image 2 of the bumpstops i received - threads too small 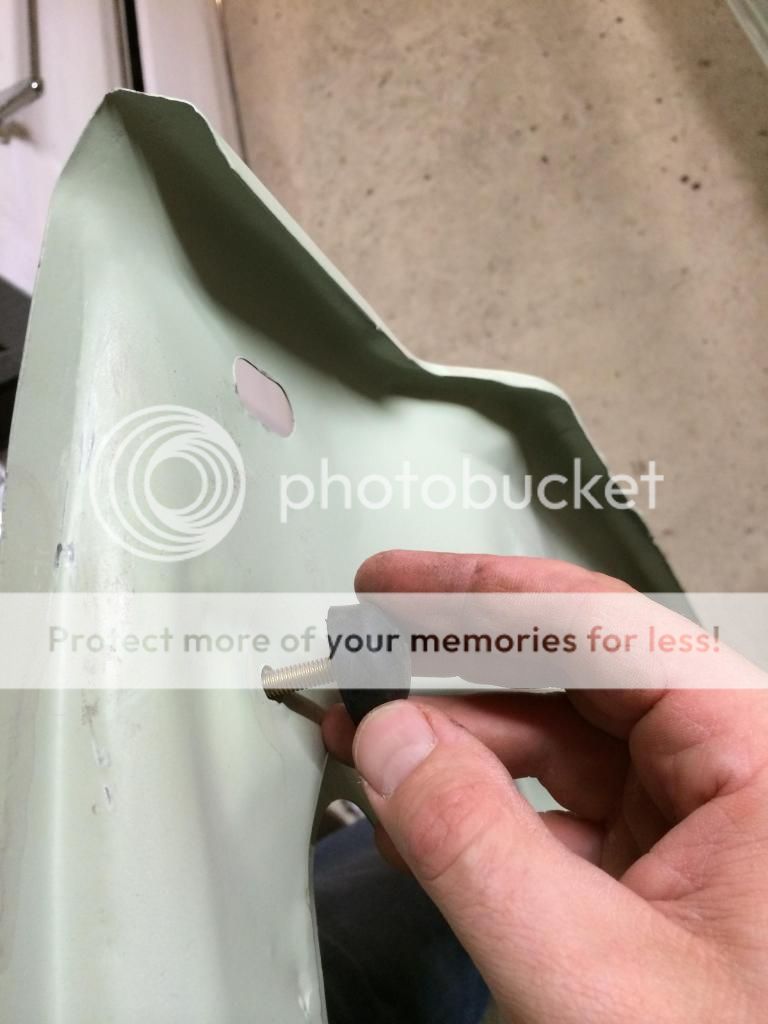 image 3 of the nuts that were installed when i received the car - thread fits but they are old and need restoring. 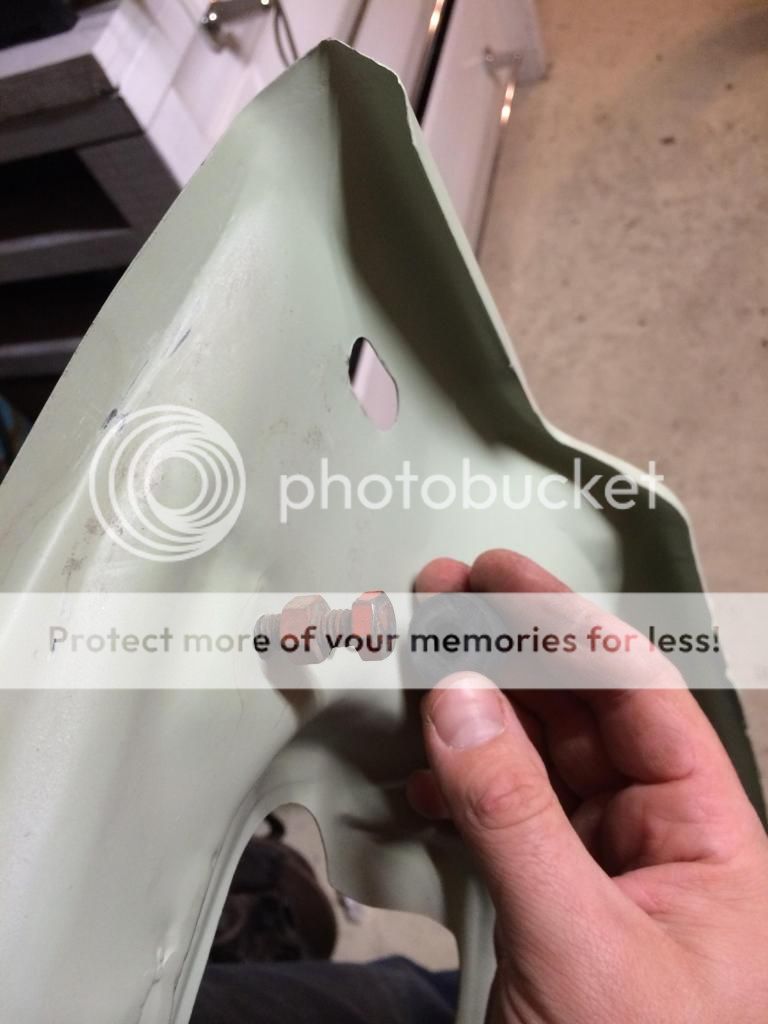
Last edited by Aether; 08-11-2014 at 08:43 PM. |
||
|
|

|
|
|
#20 | ||
|
Regular Member
Join Date: Nov 2010
Location: Peakhurst
Posts: 82
|
Just had a look at my Capri and it has a captive nut for the main catch. I assumed the three spot welds hold some kind of bracket in there but I can't see inside of mine.
Thread is M10 1.5 which is a surprise, I thought it would be imperial. see attached. Peter |
||
|
|

|
|
|
#21 | ||
|
Regular Member
Join Date: Nov 2010
Location: Peakhurst
Posts: 82
|
That attachment didn't work. I will try again.
|
||
|
|

|
|
|
#22 | ||
|
Regular Member
Join Date: Nov 2010
Location: Peakhurst
Posts: 82
|
I have run out of attachment space.
If anyone could tell me how to delete old attachments I will attach the photo. FAQ's didn't help and I can't figure it out. Peter |
||
|
|

|
|
|
#23 | ||
|
Regular Member
Join Date: Nov 2010
Location: Peakhurst
Posts: 82
|
Finally worked it out.
|
||
|
|

|
|
|
#24 | ||
|
Regular Member
Join Date: Jul 2014
Posts: 190
|
Final update:
I figured out what holds the main latch in: a large square nut that I removed when sandblasting the bonnet frame on the back side (pictured below). I think I was trying to be thorough. Ive now located the nut, sandblasted it and painted it with POR-15 for re-installation so the bonnet can be re-skinned. As for the bumpstops I found some new replacement items on eBay that work really well (pictured below). So now I have all the hardware to re-skin and reinstall the bonnet and get all the gaps right. Thanks for your help peoples  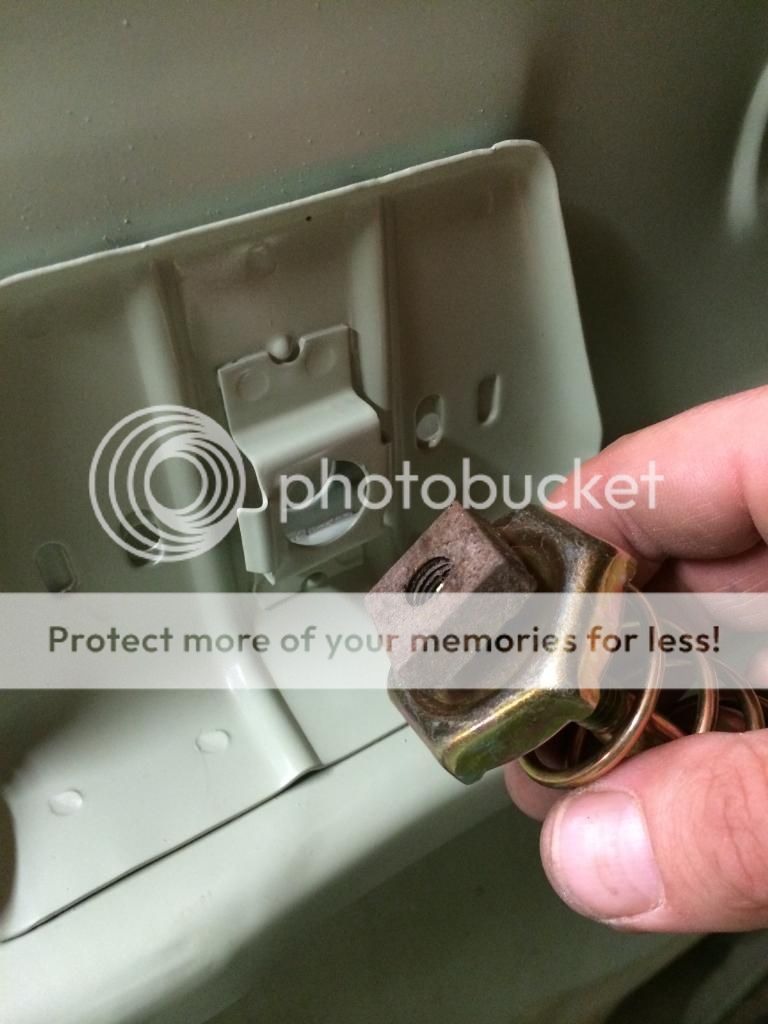 
|
||
|
|

|